 |
| Before |
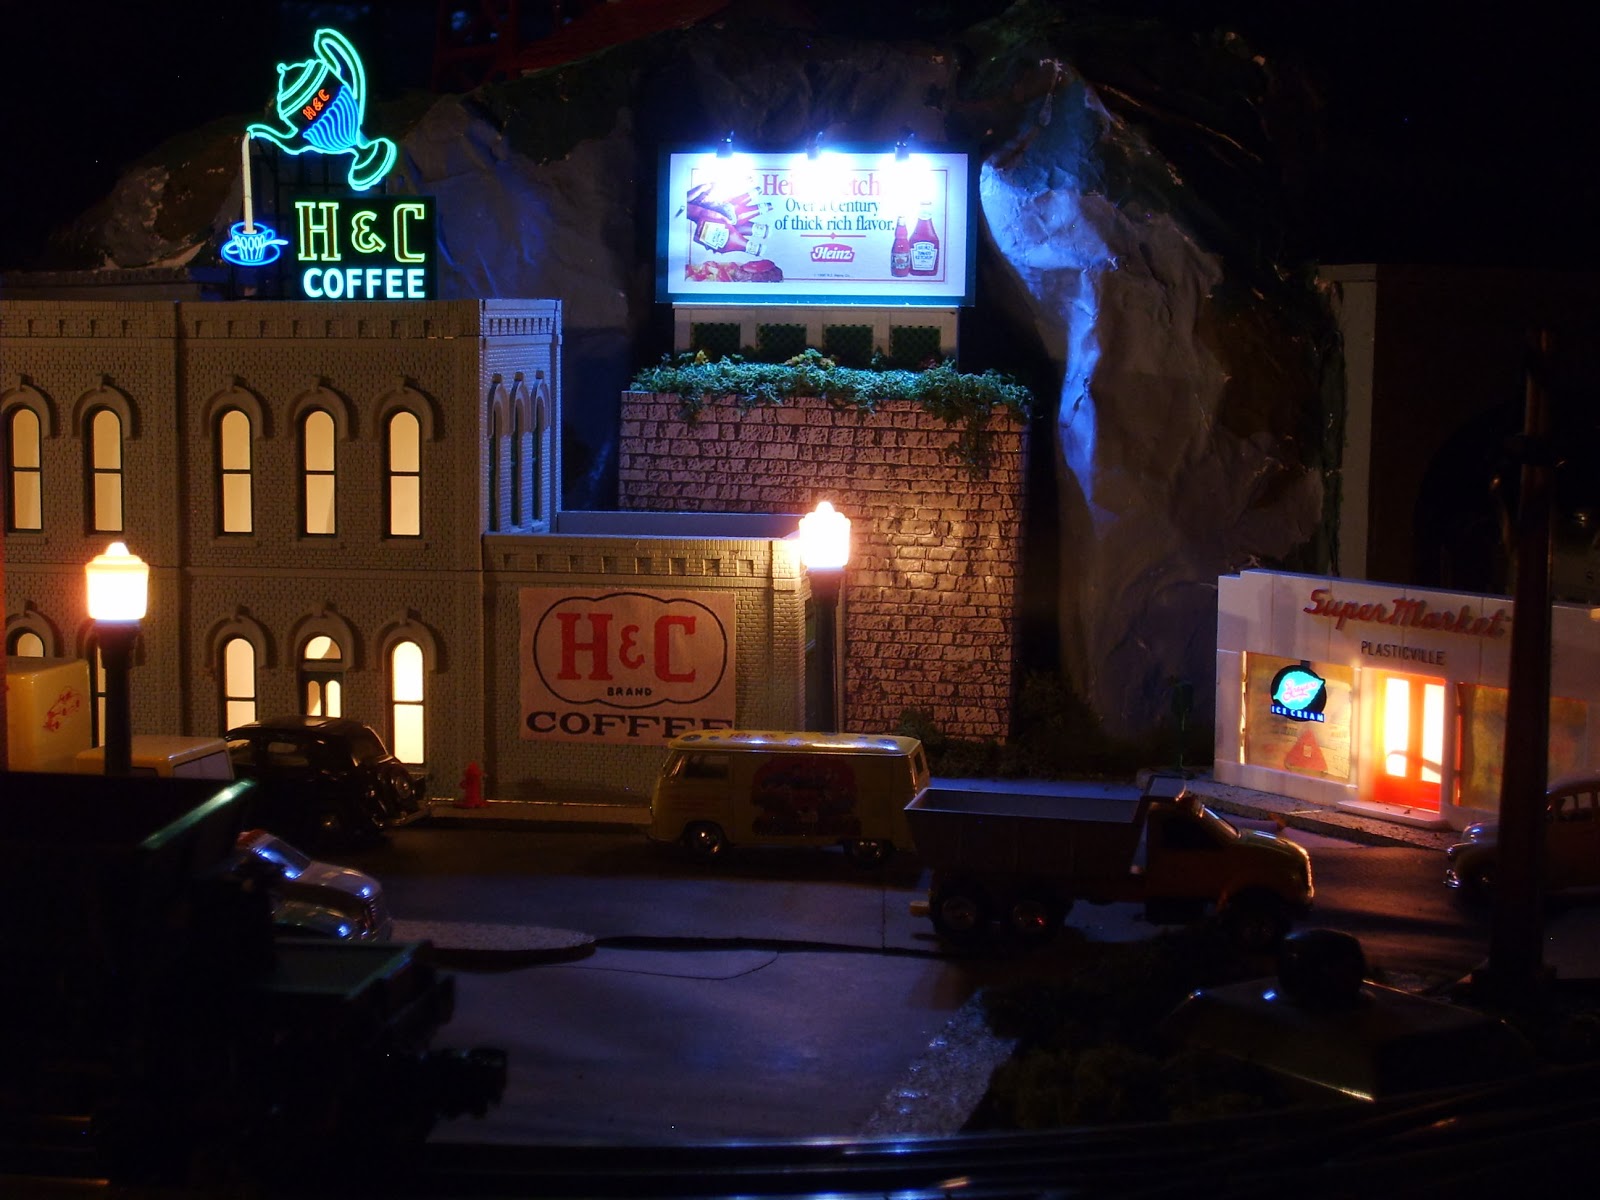
Let's be clear; virtually all train layouts -- be they for scale models or toys -- are representational rather than realistic So what's good news for a layout might be bad news in the real world. In this case, the good news was the addition of a billboard.
In the real world, billboards are considered eyesores that detract from the landscape. In miniature, though, they can add visual interest and help balance a scene. Which is why I added one to my O-gauge zen garden.
 |
| After |
The tunnel that sits in a corner of the layout had a big, hollow space that I always intended to fill with something. On either side of the space were two illuminated buildings. The H&C Coffee building had an animated sign up on the roof, and the single-story supermart on the other side had a flashing Breyer's Ice Cream sign.
The illuminated billboard I added would serve two functions. First, it would light a previously dark area. Second, by placing it above street level, it would provide a visual link between the second-story sign on one side, and the single-story sign on the other.
There are several O-gauge illuminated billboards on the market, but most are designed for toy trains and have over-sized bulbs. I wanted something a little more understated, so I went with a billboards with three LEDs.
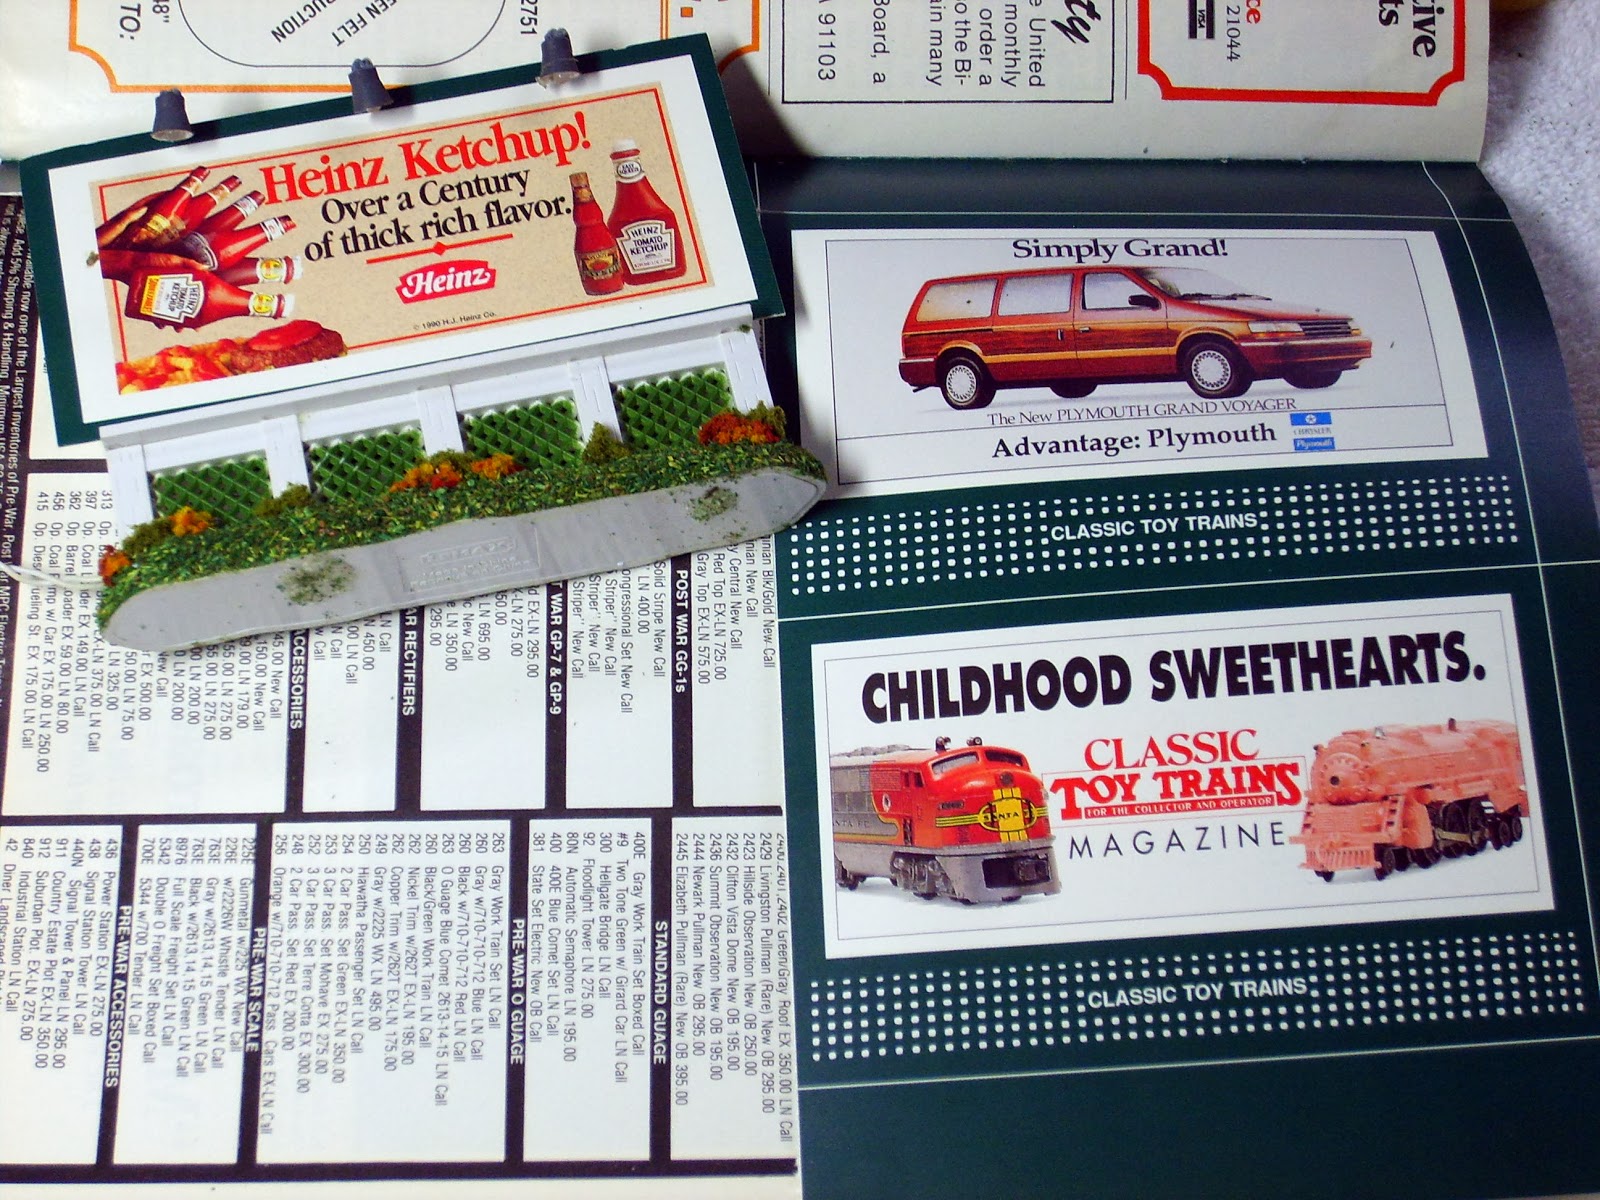
The billboard was meant to used as-is, but there was a change I had to make. As good as the molding was, the sign was finished with a poorly scanned vintage billboard message. That had to go.
I replaced it with a sign offered in Classic Toy Trains. These cardstock signs were meant as replacements for a Lionel non-illuminated billboard. I selected a sign that was both realistic and less time-sensitive. With a little trimming, it fit just fine.
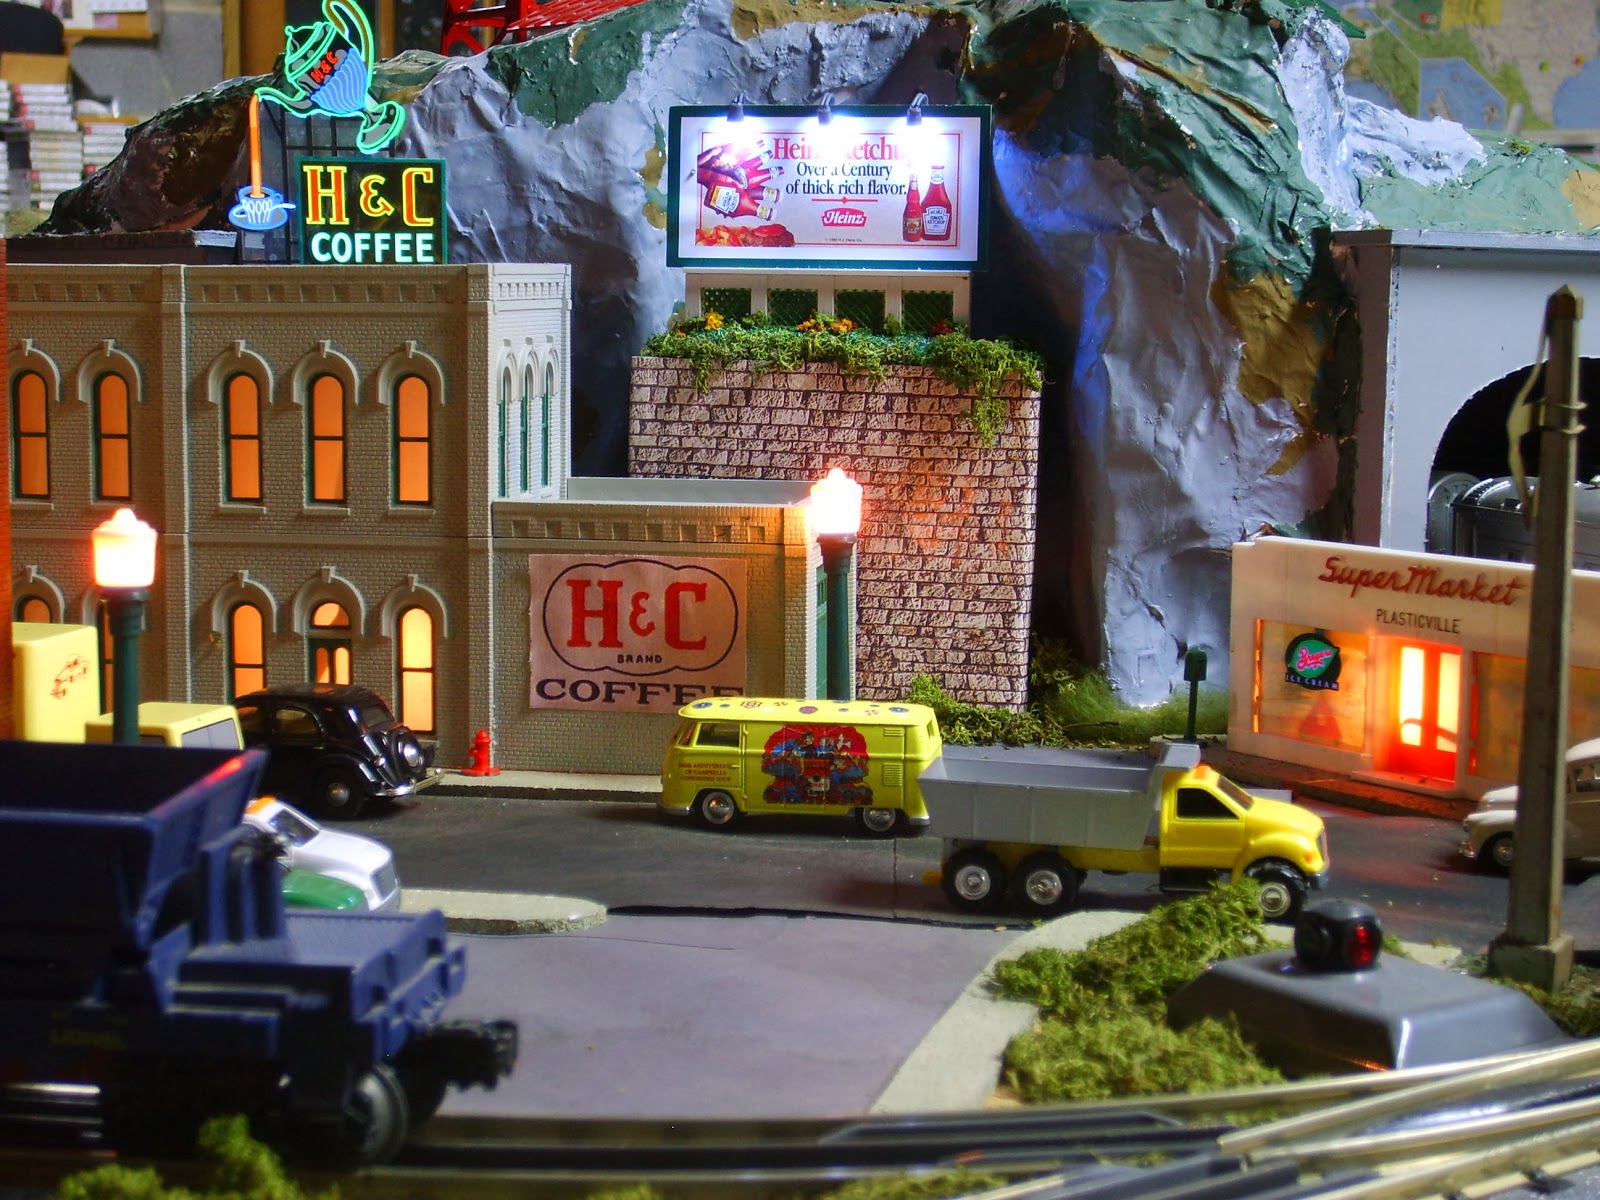
The billboard had an external battery pack, so the problem was to fit both the sign and its power source into the available space. The solution was pretty simple. I carved a block of styrfoam to fit in the space in front of the tunnel. I then cut out a place for the battery pack to fit, and glued a fiberboard piece across the back.
Perfect.
A model sheet of embossed bricks was measured and cut, then glued to the block. Finishing details included spraying the top with "wet" glue (watered-down white glue) then sprinkling with model grass. When that had dried, I glued some moss to the front of the retaining wall, letting some hang over.
The entire assembly slipped into place, and that was that. A few hours of work and the landscape in my zen garden was improved tremendously. I wouldn't welcome such a sign in real life, but on my little 3' x 5' world, it looks just fine.
 |
Another space filled in nicely. Now, what to do about that area between
the store and the billboard's retaining wall.... |


No comments:
Post a Comment